Assembly Guide for the Lehuo Curve 3-Wheel Scooter
The Lehuo Curve 3-Wheel Scooter is an innovative transport solution designed for stability, ease of use, and enjoyment, making it an ideal choice for both children and adults. Assembling this scooter is straightforward, and with this guide, you can have your scooter ready for adventure in no time!
Unboxing Your Lehuo Curve Scooter
Upon receiving your Lehuo Curve 3-Wheel Scooter, the first step is to unbox it. Carefully remove all components from the packaging, ensuring that you have everything you need
1. Main Frame – The body of the scooter. 2. Handlebars – Adjustable to match the height of the user. 3. Front Wheel Assembly – The two front wheels that provide stability. 4. Rear Wheel – A single back wheel for propulsion. 5. Tool Kit – Usually includes tools like wrenches or Allen keys.
Step-by-Step Assembly Instructions
Step 1 Attaching the Front Wheel Assembly
Begin by locating the front wheel assembly. You’ll notice that the two front wheels are attached to a bracket designed to fit onto the main frame. Align the assembly with the front of the scooter frame. You should see holes lined up for the screws. Use the screws provided in your tool kit to secure the front wheel assembly to the main frame. It’s essential to ensure that the wheels are properly aligned and rotate freely without hindrance.
Step 2 Installing the Rear Wheel
Next, take the rear wheel and line it up with the rear end of the scooter frame. Similar to the front wheel assembly, the rear wheel should have a mounting point where bolts can attach it securely to the frame. Utilize the same tool from your kit to tighten the screws firmly, ensuring that the rear wheel is securely in place.
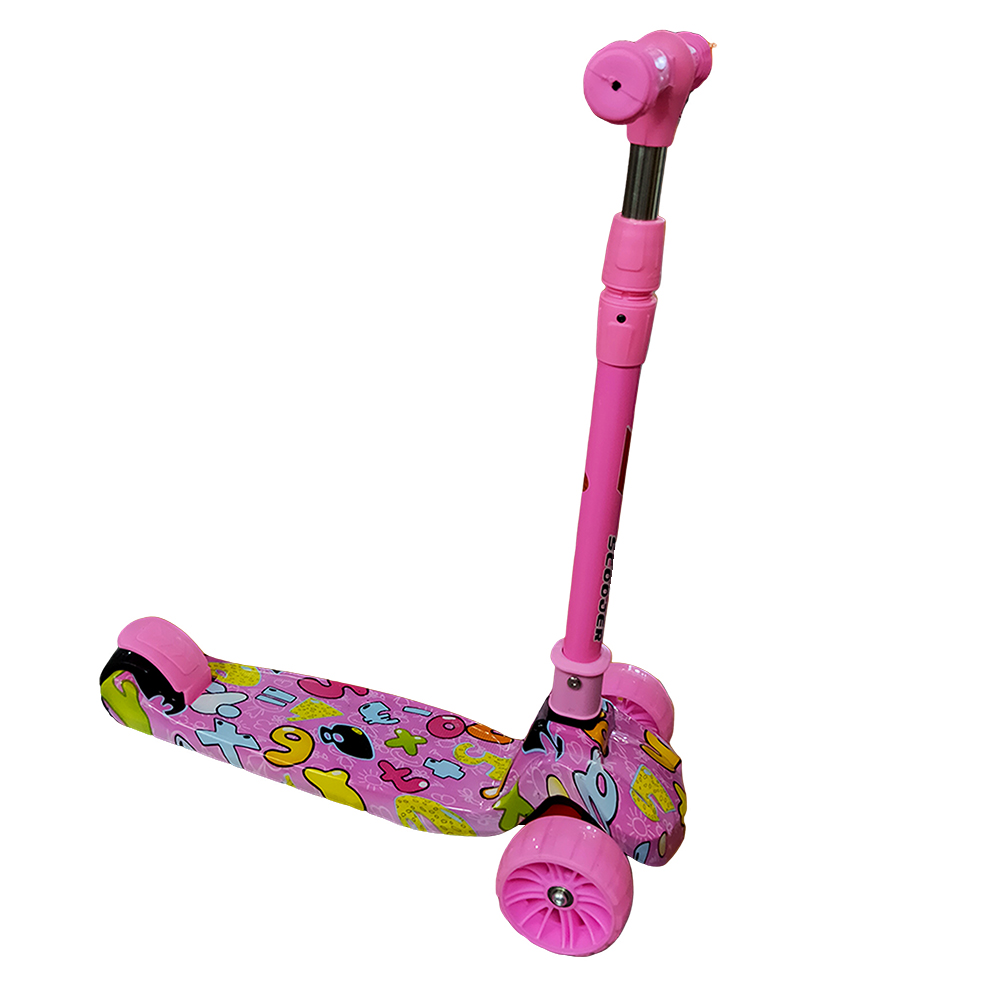
lehuo curve 3 wheel scooter assembly
Step 3 Attaching the Handlebars
Now it's time to attach the handlebars. Locate the handlebar assembly, which should have a fork that connects to the front of the scooter. Insert the handlebar into the designated socket at the top of the fork, making sure that it fits snugly and correctly. Use the provided screws to secure the handlebars in place. It’s vital that the handlebars are firmly attached, as they will be critical for steering and balancing.
Step 4 Adjusting Handlebar Height
One of the benefits of the Lehuo Curve scooter is its adjustable handlebar feature. Depending on the user’s height, you may want to adjust the handlebars. Most scooters allow you to slide the handlebars up or down, with a locking mechanism to secure them. Adjust to your preference and ensure it is locked in place before proceeding.
Step 5 Final Checks
Once all components are attached, it’s crucial to perform a final check. Ensure all screws are tightened and that each wheel rotates smoothly without obstruction. Check the handlebars for secure attachment and adjust them if necessary. It’s a good practice to lift the scooter slightly and give the wheels a spin—ensure there are no unusual sounds or resistance.
Safety Considerations
After assembly, it’s essential to familiarize yourself with the scooter's features. Check the braking system to see that it operates correctly, and consider wearing safety gear such as a helmet, knee pads, and elbow pads during your first rides.
Conclusion
Assembling the Lehuo Curve 3-Wheel Scooter can be done in just a few steps, making it accessible for anyone, regardless of experience. Once your scooter is assembled and checked for safety, it opens up a world of fun and exciting travel opportunities, whether you’re cruising through the park, navigating city streets, or simply enjoying some leisure time outdoors. Happy scooting!

-

 Scoot&RideKids Child Kick Push Scooter 3 Wheels with LED Flashing Tilt Lean Boys Girls Scooter
- 4
$33.17 -
 Scoot&RideKids Scooter Child Kick Flashing LED Light Up 3 Wheel Push Adjustable Folding 3
- 0
$25.52 -
 Scoot&RideKids Scooter Child Kick Flashing LED Light Up 3 Wheel Push Adjustable Folding 2
- 0
$33.17 -
 Scoot&RideKids Scooter Teens Foldable Kick Push Scooter Adjustable Height Safe 2 Wheels
- 4
$49.99
Meet our partners and discover what powers their creativity!
When you register for a Lohas scooter, you will receive a 10% discount on your first order and can be notified of sales, new product launches and other offers in advance.


